First things first, we need a character which moves around! Create an empty Unity 3D game project
that imports none of the unity packages which comes with the software. 首先,我们需要一个可以自由活动的角色。第一步当然需要创建一个空的unity3d项目了,创建时不要导入任何的资源包。
Open Unity > Goto > File > New Project > Name it 'EVAC-CITY tutorial'.
If you don't have it already go ahead and download the free resources needed for this tutorial here:
Download tutorial resources
Download the Example Projects
Then Open up the Unity project you have just created goto the assets folder and drag the Tutorial
Resouces folder you had downloaded and drag it into the assets folder.
Once this is done you can now save the scene Goto > File > Save Scene As...
Scene. 将所创建的项目命名为EVAC-CITY tutorial,所需项目素材在附件中,然后将所需的资源文件拖至项目assets目录下。当然,自己制作也可以。 Firstly I'm going to create an empty game object and name it 'Player', to rename an object left click
over the name of the object in your Hierarchy and keep your mouse stationary over the object after
releasing left click for a second.. Then from the menu with your new game object selected, choose
(component – mesh – mesh filter), and (component – mesh – mesh renderer). In the mesh filter I am
going to select 'plane' which is made available from adding the above .fbx file to your assets folder.
Also, select 'plane' from your project window, in the inspector look at the FBX importer component, set
the scale factor to 1 and click apply. 首先,创建一个空的物体,并命名为“Player”,选择此物体,并为其添加"mesh filter","mesh renderer" 组件。将mesh filter的mesh属性指定为刚“plan”网格。然后在项目窗口下选择"plane"物体,在其fbx导入设置中,将缩放因子改为1。
Now we need a material to render our character onto the plane! You might have noticed that when you
import an fbx file it automatically creates a material for you. I'm just going to delete what it creates
and create my own and name it 'PlayerMaterial'. Right click the project window and create a new
material. Select the PlayerSpriteSheet.png that you downloaded above and use it as a texture for your
new material. Select (transparent-diffuse) as the shader for your material.
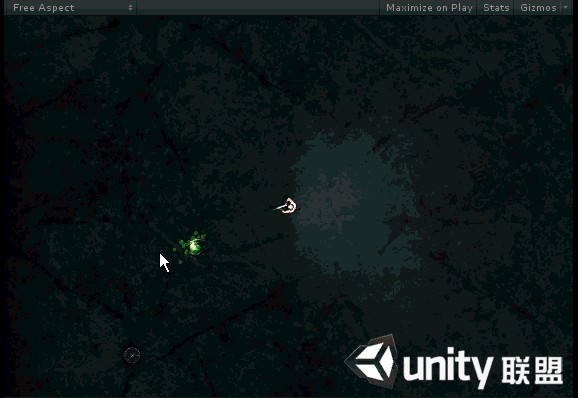
Now in your player object's mesh renderer, select your PlayerMaterial in the materials tab. You should
now see what is displayed in the image on the next page:
接下来 ,为我们的角色(即平面)指定一个材质,你可能已发现,unity3d在导入fbx文件时,会自动创建一个材质,在此将自动创建的材质删除并手动创建一个新的材质赋予角色,将此材质命名为"PlayerMaterial",将其shader指定为transparent-diffuse,并指定其贴图为PlayerSpriteSheet.png。
Okay our player is being rendered onto our plane! Now let's make sure he's tiled correctly. Select your
PlayerMaterial and set your X tiling to -0.2 and your Y tiling to -0.25. We are going to animate our
character by changing the tiling of the character dynamically over time! I set the Y tiling to -0.25 for
mathematical reasons, in the next tutorial we shall cover animation and if this is not set to a negative
value the animation wont run properly because of the way I have set up calculating which animation to
play. And set the X tiling to -0.2, I have no idea why it's a negative value I must have had a reason a
while ago when I wrote the animation code but the code likes it to be that way and I'm going to trust it.
Next add to your player (component – physics – rigidbody) and (component – physics – capsule
collider) the capsule collider adds a collision object to our player, this collision object will collide with
other collision objects in our world. The rigidbody gives our player a physics based movement to our
capsule collider, this is allows our collider to move around, push and interact with other objects in our
game world. 现在我们的角色已经出现在场景中平面物体上,选择角色材质,将贴图的XYtiling分别设置为-0.2和-0.25, 最终角色的动作即是通过连续改变其贴图的XYtiling来实现的。接下来为角色添加刚体组件及碰撞组件,使角色可以移动及与其它物体的影响!
Make sure you turn off the use gravity check box in your rigidbody component otherwise your player is
going to keep on falling forever.
It's time now to script our character to move around. But first I should let you know, if you are new to
programming more than likely you're only going to understand bits and pieces of code at a time, to
understand it all at once takes experience, don't fret if you go ahead and implement the code in this
tutorial without understanding it all. Understanding comes over time with experience and it's normal
not to understand things.
记着关闭刚体组件的重力属性,接着就需要为角色编写代码,使其可以移动起来!
Right click in your project window and select (create – C Sharp Script) call your script 'AIscript', now
it's completely up to you how you organise your project window (we spell organize with an S in
Australia). In the future I wont tell you where to put the things you create in this tutorial but leave it up
to you to put things where you think they belong best. In this case I created a folder called 'scripts' and
put my C Sharp Script in there. The reason I am calling this script 'AIscript' instead of say
'PlayerScript' is that this script is going to be designed in such a way that both the enemies and player
will use the same script. You could create separate scripts but I personally like to keep things local.
Now open your AIscript and firstly and always change the name of class to the name of the script
otherwise Unity wont compile it. 右击项目窗口,创建c#脚本文件,将其命名为“AIscript”,并创建"scripts"文件夹,将脚本文件放于此文件夹,在项目过程中,保持一良好的层次条理结构。下面进行代码部分的说明:
using UnityEngine;
using System.Collections;
public class AIscript : MonoBehaviour { 创建AIscript类
Any code highlighted blue in this tutorial is code that wont change, anything highlighted red is the code
I am indicating for you to change. If the code is simply a green color, it is completely new code with
no code which is preexisting.
Leave the Start and Update functions as they are, the Start function is called only once at the beginning
of the object's life which is using the script, and Update is called once every frame while the object is
alive. Start函数及Update函数留空,这两个函数是在创建C#脚本文件时程序自动产生的。
Let's create a new function called FindInput(); This function will find the input which needs to be sent
to the remaining functions to determine what the character will do. This input is either going to be
player controlled or AI controlled. I am also going to add 2 more functions below FindInput, one will
be used for finding the player's input and the other for AI input.
Add this below the Update function: 下面我们创建一个名为FindInput()的新函数,
void FindInput ()
{
if (thisIsPlayer == true)
{
FindPlayerInput();
} else {
FindAIinput();
}
}
void FindPlayerInput ()
{
}
void FindAIinput ()
{
}
在前面的代码中我们用到了一个布尔变量thisIsPlayer,但是并未声明,所以我们要加入其声明代码,如下:
public class AIscript : MonoBehaviour {
private bool thisIsPlayer;
// Use this for initialization
void Start () {
I hope this code so far is straight forward, this tutorial wont go into the core basics of programming but I hope it gives you a feel for what is happening. A bool is a type of variable, the variable thisIsPlayer can only be 'true' or 'false'. There are other types of variables we'll use later. A private variable can only be used by the object which has that script. A public variable can be accessed by other objects and other scripts. In C# you must always have the objects 'type' before the name of the variable. In this case the type is 'bool'.
此段说的是关于编程的一些基础知识,与此教程关系不大,略过...
Now go into your Unity editor and select your 'Player' object, in the inspector window set the player's
'tag' to 'player'. A tag can be used to identify an object. Now go back into your script and add below
your last variable a new variable which is a GameObject variable.
回到unity3d程序,选择“Player”物体,在其属性面板中,将其标签改为"player",此处有点类似于flash中给场景中mc命名,其实还是为了运行时引用此物体,并进行控制。接着在脚本中声明两个变量,类型为GameObject,如下:
private bool thisIsPlayer;
private GameObject objPlayer;
private GameObject objCamera;
Pointers are variables which give us access to objects in our world. In this case objPlayer will be the
pointer which we use to access properties of our player object in our game. The MainCamera object in
your world automatically has the 'MainCamera' tag assigned to it.
上面几个变量即是对场景中主要物体元素的引用,接下来的代码将引用与实际的物体对象关联起来,以便进行访问控制。
Let's assign our objPlayer.
void Start () {
objPlayer = (GameObject) GameObject.FindWithTag
("Player");
objCamera = (GameObject) GameObject.FindWithTag
("MainCamera");
if (gameObject.tag == "Player") { thisIsPlayer =
true; }
}
Remember how we added the tag 'player' to our player object? This line of code is now assigning our
player object to the variable objPlayer. So now if an enemy uses this script it will have access to our
player. Later we are going to add a script to our player which is going to contain all public game
variables, and all our enemies are going to need to access these, and they are going to use objPlayer to
access them! Whenever you use 'gameObject' in a script it is a pointer to the object which is using the
script, in this case we are seeing whether the gameObject has the tag 'player' and if it does we are
setting the thisIsPlayer variable to true.
下面我们来******玩家的输入,如键盘、鼠标等,具体按键的使用,按软件默认的即可,具体设置在edit –project settings – input菜单下,当玩家输入时,需要定义各种函数进行反映,下面的代码即为******玩家玩家的各种操作,并让游戏做出反应。
Now we need to find our player input, what keys is our player pressing? In your menu go to (edit –
project settings – input) here you can see all the default player definable input for our game. I am
going to use the default settings for this project, and will change it only as needed. But we are going to
use functions to find out what keys the player is pressing. Let's add some code to our script! You can
just copy over your entire script file with the following code, (yes it's a lot of code!)
代码开始:
public class AIscript : MonoBehaviour {
//game objects (variables which point to game objects)
private GameObject objPlayer;
private GameObject objCamera;
//input variables (variables used to process and handle input)
private Vector3 inputRotation;
private Vector3 inputMovement;
//identity variables (variables specific to the game object)
public float moveSpeed = 100f;
private bool thisIsPlayer;
// calculation variables (variables used for calculation)
private Vector3 tempVector;
private Vector3 tempVector2;
// Use this for initialization
void Start () {
objPlayer = (GameObject) GameObject.FindWithTag ("Player");
objCamera = (GameObject) GameObject.FindWithTag ("MainCamera");
if (gameObject.tag == "Player") { thisIsPlayer = true; }
}
// Update is called once per frame
void Update () {
FindInput();
ProcessMovement();
if (thisIsPlayer == true)
{
HandleCamera();
}
}
void FindInput ()
{
if (thisIsPlayer == true)
{
FindPlayerInput();
} else {
FindAIinput();
}
}
void FindPlayerInput ()
{
// find vector to move
inputMovement = new Vector3( Input.GetAxis("Horizontal"),
0,Input.GetAxis("Vertical") );
// find vector to the mouse
tempVector2 = new Vector3(Screen.width * 0.5f,0,Screen.height *
0.5f); // the position of the middle of the screen
tempVector = Input.mousePosition; // find the position of the moue
on screen
tempVector.z = tempVector.y; // input mouse position gives us 2D
coordinates, I am moving the Y coordinate to the Z coorindate in temp Vector and setting the Y
coordinate to 0, so that the Vector will read the input along the X (left and right of screen) and Z
(up and down screen) axis, and not the X and Y (in and out of screen) axis
tempVector.y = 0;
Debug.Log(tempVector);
inputRotation = tempVector - tempVector2; // the direction we want
face/aim/shoot is from the middle of the screen to where the mouse is pointing
}
void FindAIinput ()
{
}
void ProcessMovement()
{
rigidbody.AddForce (inputMovement.normalized * moveSpeed * Time.deltaTime);
transform.rotation = Quaternion.LookRotation(inputRotation);
transform.eulerAngles = new Vector3(0,transform.eulerAngles.y + 180,0);
transform.position = new Vector3(transform.position.x,0,transform.position.z);
}
void HandleCamera()
{
objCamera.transform.position = new Vector3(transform.position.x,
15,transform.position.z);
objCamera.transform.eulerAngles = new Vector3(90,0,0);
}
}
以上代码比较长,将此代码添加到player物体上,即完成对角色的简单控制,切换到游戏模式下,发现角色已可以四处行动了。接下来将对以上AIscript代码进行详细讲解。
Hopefully you're not feeling too daunted by the sheer amount of code I have thrown in front of you! I
shall go through it line by line below, the reason I have thrown in so much code is to allow you to run
your Unity application and have your player character move around! If you now click the play button
at the top middle of your Unity interface you should be able to play the game and move your character
quite awkwardly around.
Firstly let's examine our update function:
void Update () {
FindInput();
ProcessMovement();
if (thisIsPlayer == true)
{
HandleCamera();
}
}
通过update函数侦听玩家操作,并将对应变量发往ProcessMovement 角色移动函数
We are calling the FindInput function to find out what keys are being pressed and set the variables to
send into the ProcessMovement function to move our character. If we are the player we want to call
HandleCamera and set the camera to follow our player.
void FindPlayerInput ()
{
// find vector to move
inputMovement = new Vector3( Input.GetAxis("Horizontal"),
0,Input.GetAxis("Vertical") );
// find vector to the mouse
tempVector2 = new Vector3(Screen.width * 0.5f,0,Screen.height *
0.5f); // the position of the middle of the screen
tempVector = Input.mousePosition; // find the position of the
moue on screen
tempVector.z = tempVector.y; // input mouse position gives us 2D
coordinates, I am moving the Y coordinate to the Z coorindate in temp Vector and
setting the Y coordinate to 0, so that the Vector will read the input along the X
(left and right of screen) and Z (up and down screen) axis, and not the X and Y (in
and out of screen) axis
tempVector.y = 0;
inputRotation = tempVector - tempVector2; // the direction we
want face/aim/shoot is from the middle of the screen to where the mouse is pointing
}
下面一段编程相关知识点,略过....
Now we're using some Vectors! If you're not familiar with Vectors then there is some learning you
may need to do online, they can be both complicated and simple but in the end they are your best friend
when it comes to controlling how objects move in a 3D world. Notice I am using the word 'new' in
some of those lines of code, this is purely C# syntax, it needs to do this when assigning new memory
for new variables I believe. The first line of code is finding out what keys the player is pressing,
remember in (edit - project settings – input) one of the input fields was called Horizontal?
Input.GetAxis("Horizontal") is giving us a variable between -1 and 1 telling us which key is being
pressed, pressing A will give us -1 and pressing D will give us 1.
Next we are finding out the rotation of the character, inputRotation is a Vector3, which calculates the
Vector from the center of the screen to the mouse position. I wont go into the mathematics of this but
that is what is happening in those few lines of code.
Now we are processing the movement:
下面即为处理角色行动的函数ProcessMovement,包括移动、旋转、刚体的控制等等属性,
void ProcessMovement()
{
rigidbody.AddForce (inputMovement.normalized * moveSpeed *
Time.deltaTime);
transform.rotation = Quaternion.LookRotation(inputRotation);
transform.eulerAngles = new Vector3(0,transform.eulerAngles.y +
180,0);
transform.position = new Vector3(transform.position.x,
0,transform.position.z);
}
Because earlier we added a rigidbody component to our player character, we can now call the
AddForce function to move it. Rigidbody is a pointer which automatically refers to the rigidbody
component attached to the gameObject using the script. If we didn't have a rigidbody attached to the
gameObject and were referring to it in a script, we would get an error. Remember our Vector which
held the information which keys the player was pressing? We are now putting those keys onto the X
and Z axis of the real player and moving it accordingly. When we use the .normalize function of a
Vector3. We are restricting the Vector to a size of 1. If we didn't do this there might be times in which
the player would move at different speeds because the Vector might be at different sizes. We are then
multiplying the Vector by the movement speed of the player and by Time.deltaTime. I don't know if
Time.deltaTime makes a difference here but as I'm used to in my 3D Game Studio days, it is used to
make the movement smooth and consistent depending on the framerate, if this line wasn't here and the
framerate change the speed the player moved might change also.
Quaternions! They are lovely! Transform.rotation is a Quaternion type of variable, and we cannot
simply tell it to accept a Vector type, so using the LookRotation function we are converting the Vector
into a Quaternion. And setting the rotation of the transform to the rotation of the inputRotation Vector.
Because this is a 2D game, we don't want the object rotating on any other axis asdie from the Y axis,
because we are applying a force on a cylinder collider the object will often rotate along the X and Z
axis as it pleases. In the 3rd instruction of code we are simply reseting the rotation along the X and Z
axis to 0, and maintaining the original rotation along the Y axis. We rotate the Y axis eular angle by
another 180 degrees because in the sprite's material we set the tiling to -0.25, this means we must rotate it around to make sure our object is facing the correct direction.
The final line always makes sure the game object is at a coordinate of 0 along the Y axis, this is to stop
other physics objects in the world pushing the object up or down along this axis, if we didn't have this
the object might eventually not collide with some objects.
And finally we are setting the camera:
void HandleCamera()
{
objCamera.transform.position = new Vector3(transform.position.x,
15,transform.position.z);
objCamera.transform.eulerAngles = new Vector3(90,0,0);
}
Only the player calls this function, but the camera Object is being set to a position which is at the X and
Z coordinate of our player object, the Y position remains the same at 15. You can adjust this number
as you please to see what it looks like if the camera if farther or closer to the player.
The next instruction is simply setting the rotation of the camera to always look directly down on the
player.
Also look at the variables, I've added a public one:
public float moveSpeed = 100f;
We use 'f' when dealing with number and the type of variable float, it is a requirement of C# syntax.
That is why it appears after the number 100. Technically you don't have to add the 'f' unless you are
using a number which has decimal points but I like to keep it in always for consistency.
Public variables in Unity 3D can be accessed and changed from the Unity editor, even while the game
is running! Although while the game is running, you can safely change the variables as you please, and
when you stop playing the variables will go back to the value they had before you were playing. You
can change the movement speed dynamically, in game, by selecting the Player object, and changing the
variable in the AIscript which is in the inspector window.
Go ahead and add a cube to your scene near your player (game object – create other – cube). Now
click the play button and watch your player move around, if you didn't add the cube you might be
under the false illusion that your player character wasn't moving around ;) Rest assured it is your
player that is moving and not the cube.
Does your brain feel overloaded with information yet? It has taken me 2 hours to write this much
documentation so far and would have taken me 10 minutes to do this work in the game engine. This is
how much work needs to go into a tutorial! It is much harder than making a game itself and why you
don't find many fully in-depth how to make a game tutorials out there.
How can you make your character move better? Like a real life character not a block of ice.
-Select your player object and in it's rigidbody component set it's mass to 6 and drag to 12, change your
movement speed to 20,000
-open (edit – project settings – input) open up both the Horizontal and Vertical tabs, set both the
Gravity and Sensitivity to 1000.
Just for fun I added a rigidbody to the cube and turned off it's gravity to push around.
Don't Forget to save your scene Goto > File > Save Scene.
You're ready for the next tutorial, Character Animation!
至此完成角色的移动控制功能!
源码附带原教程贴图素材等
预览图,稍大,请耐心等待
| 


 窥视卡
窥视卡 雷达卡
雷达卡 发表于 2012-11-20 15:06
 提升卡
提升卡 置顶卡
置顶卡 沉默卡
沉默卡 喧嚣卡
喧嚣卡 变色卡
变色卡 千斤顶
千斤顶 显身卡
显身卡 发表于 2012-11-20 16:16